This guide is intended for advanced users with a Company manager account and a subscription plan “Premium”, and for companies using Google Workspace (ex: google suite).
if you need help to integrate and configure your google account, please contact support.
After processing those steps all the users within your plan and using an email associated with your company will be able to use: Gmail (send and receive emails), google calendar (sync calendars with google calendars), drive (import files from the drive) and synchronize your Google contacts).
This first guide is to create a google developer account and configure it, in the next guide you will see how to configure it in the RealEstateCRM.io app.
1. Create a Google Account in API project
In order to integrate Google accounts into your application, you first need to connect your RealEstateCRM.io to a Google API project. This will enable users to authenticate with their Google account and provide access to the data that you stipulate in the Google API.
- Go to https://console.developers.google.com/project
- Click Create Project.
- Give your project a name.
- Select your project Organization and Location if applicable.
- It can take several minutes for the project to be created. Once complete, you should see a green checkmark notification.
2. Enable Google APis
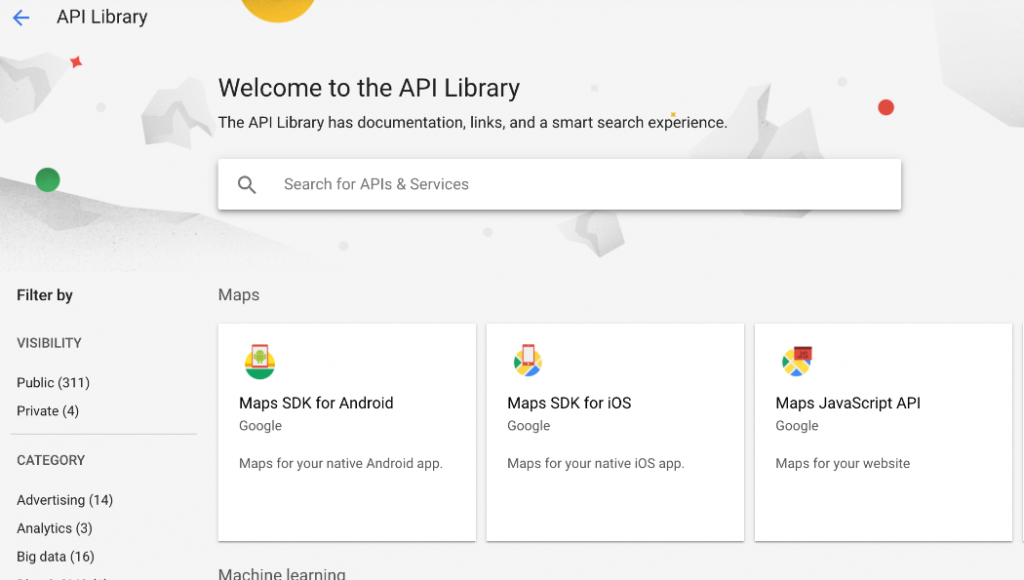
- Click Enable APIs and Services or Library.
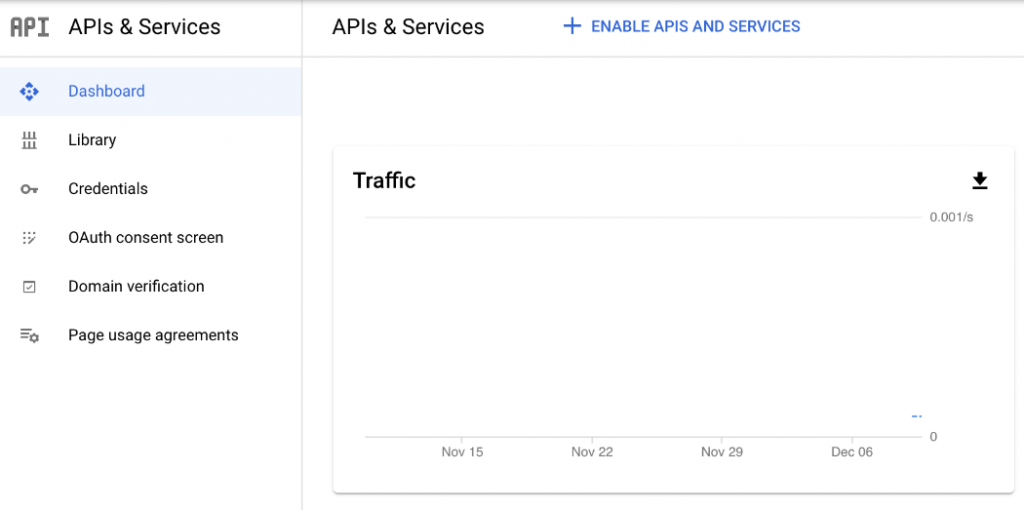
- Enable the following APIs. You can find the APIs using the search.
- Gmail API
- Google Calendar API
- Contacts API
- People API
- Drive Api
3. Configure Your OAuth Screen
You can configure your application’s OAuth screen. This is the page users will see when they authenticate your application.
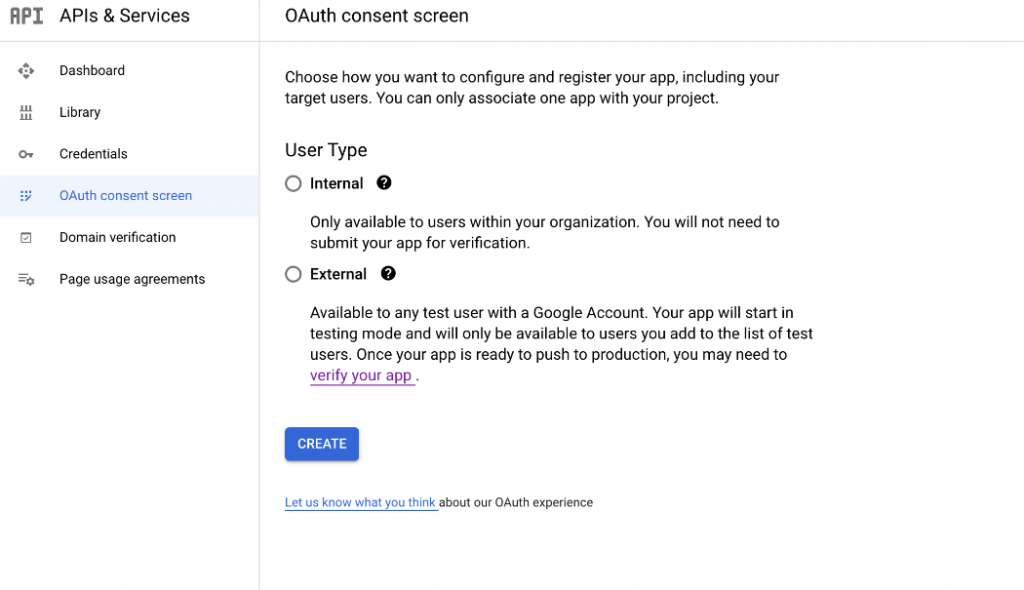
- From the Google APIs dashboard, click OAuth consent screen.
- Select “Internal”
only user who have an account within your organization @your-organization.com will have access.
Internal Oauth Screen
- Next, fill out the required OAuth consent information. For the Authorized domains use
realestatecrm.io. - Save and Continue.
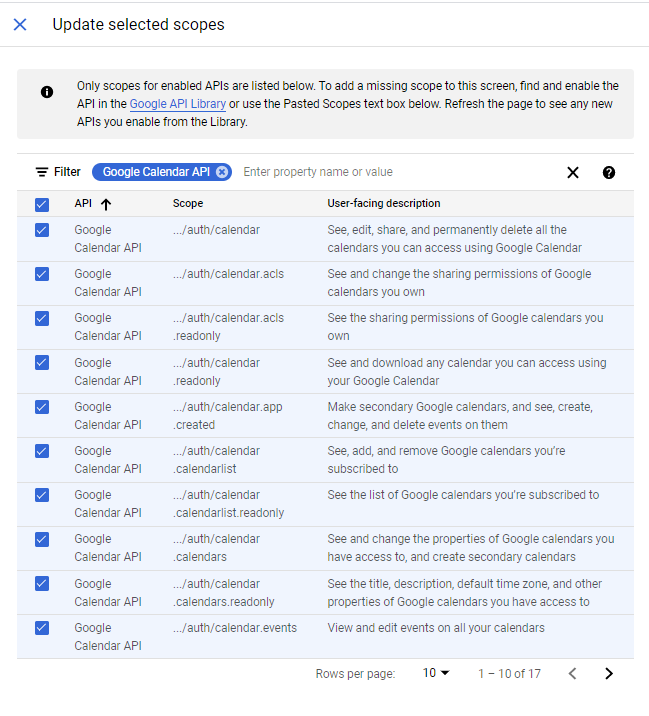
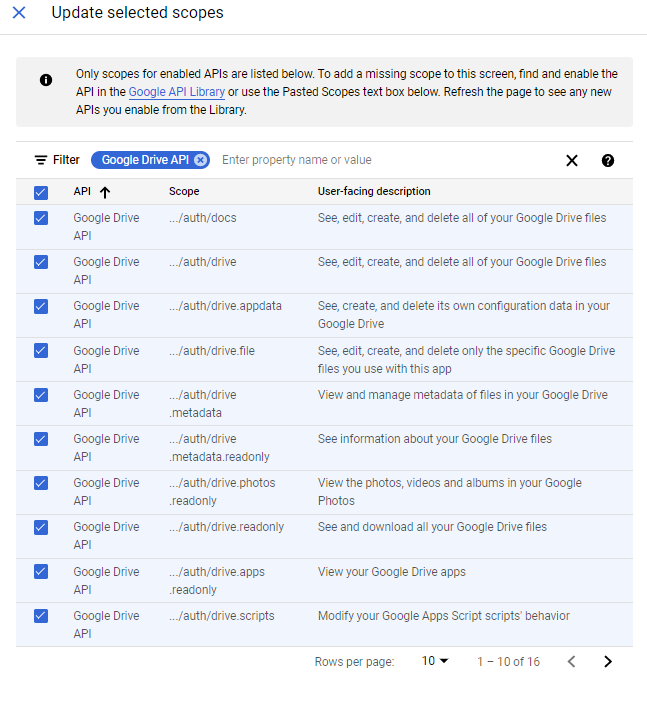
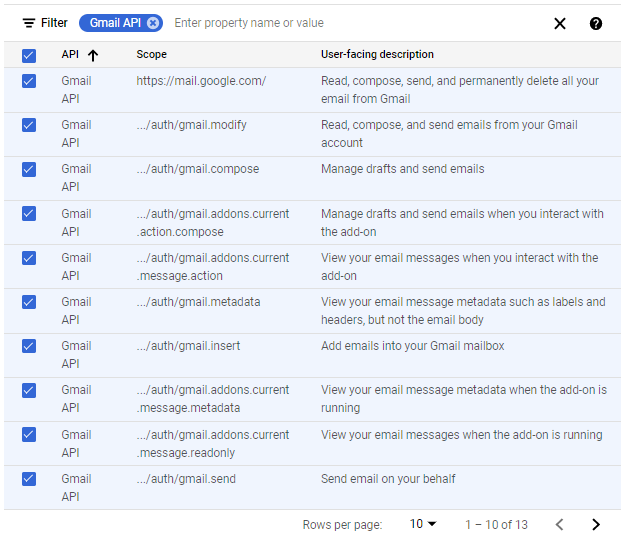
- Click Add or Remove Scopes. Select
if you have added the apis, the scopes must have been added other you may add all the scopes related to gmail, calendar, drive, contacts and people.-
- Type in filter GMAIL API and select all
- TYPE Drive API and select all
- Type Calendar and select all
- Type Contacts and select all
- Type People and select all
-
- Review the Summary and make sure the information is correct for your application
4. Create Credentials
- Click Create Credentials or Credentials.
- Select OAuth client ID.
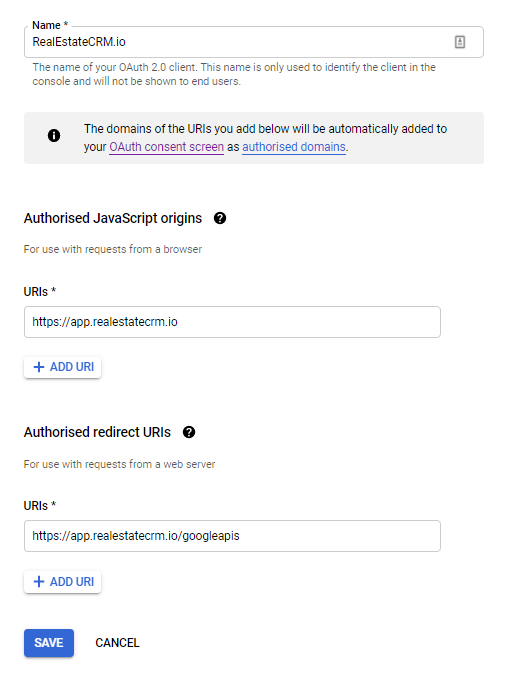
- Select Web Application as the Application Type.
- Give the application a name.
- Update Authorized redirect URIs:
- Authorised JavaScript origins – https://app.realestatecrm.io
- Authorised redirect URIs : https://app.realestatecrm.io/googleapis
- Click Create.
- You’ll see your Client ID and Secret displayed in OAuth client created. Save this someplace safe.
