This guide will help you configure your email settings on RealEstateCRM.io. For a video tutorial, watch below.
For a text tutorial, read the below instructions.
Configuring Your Email Settings
- After logging in to RealEstateCRM.io, click on your account picture on the top-right part of the screen and a dropdown will show. Click on the “Account” from the Settings tab to view your account.

2. From there you can edit your profile, preferences, email, and notification settings. Since we’re focusing on Email Settings in this tutorial, click on the “Email Settings” tab to configure Outgoing and Incoming Mail Settings.

3. The “Mail Settings (SMTP – Outgoing) tab is where you can set up the SMTP settings. Copy below settings depending on your email provider:
GOOGLE GMAIL – Settings
- Go to your Google Account.
- On the left navigation panel, choose Security.
- On the “Signing in to Google” panel, choose App Passwords. If you don’t see this option:
- 2-Step Verification is not set up for your account.
- 2-Step Verification is set up for security keys only.
- Your account is through work, school, or other organization.
- You’ve turned on Advanced Protection for your account.
- At the bottom, choose Select app and choose the app you’re using.
- Choose Select device and choose the device you’re using.
- Choose Generate.
- Follow the instructions to enter the App Password. The App Password is the 16-character code in the yellow bar on your device.
- Choose Done.
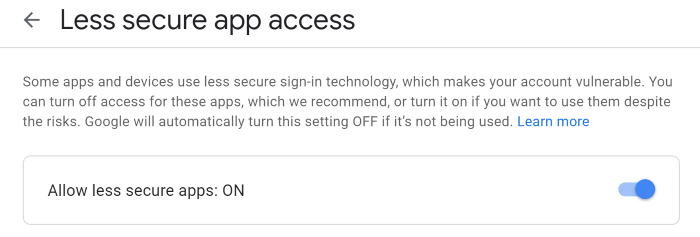
1.2 NOT RECOMMENDED – Turn off Less secure apps
This is not a recommended option.
A. Go to https://myaccount.google.com/security
B. Turn ON secure apps


2. SET YOUR SMTP SETTINGS
- Username: Your Gmail address.
- Password: Your APP password (option 1.1) or your GMAIL password (option 1.2).
- Host: smtp.gmail.com
- Port (TLS): 587
- Encryption: TLS
- Mail From Name: Your Name
- Mail from the address: Your email address
OFFICE 365
- SMTP server address: smtp.office365.com
- SMTP username: Your email address
- SMTP password: Your password
- SMTP port (TLS): 587
- Encryption: TLS
Enable SMTP AUTH
- Use the Microsoft 365 admin center to enable or disable SMTP AUTH on specific mailboxes
- Open the Microsoft 365 admin center and go to Users > Active users.
- Select the user, and in the flyout that appears, click Mail.
- In the Email apps section, click Manage email apps.
- Verify the Authenticated SMTP setting: checked = enabled.
- When you’re finished, click Save changes.
More information: https://learn.microsoft.com/en-us/exchange/clients-and-mobile-in-exchange-online/authenticated-client-smtp-submission
OTHER EMAIL PROVIDERS:
- Host: smtp-mail.outlook.com
- Username: Your Outlook Email Address (e.g. example@outlook.com)
- Password: Your Outlook Password.
- Port Number: 587 (With TLS)
- Encryption: TLS
- Host: smtp.mail.yahoo.com.
- Username: Your Yahoo Address (e.g. example@yahoo.com)
- Password: Your Yahoo Password.
- Port Number: 587 (With TLS)
- Encryption: TLS
- Mail From Name: Your Name
- Mail from the address: Your email address

Other Email Settings
4. You can also add your email signature under the “Signature” field. You can type it directly or paste e code by clicking the “Source” button. Once you’re done setting them all up, don’t forget to click the “Save” button.

Accessing Your Leads
5. You can now start sending emails to your leads. Click on the “Sales” from the left sidebar and “Leads” from the dropdown to access your Leads.
Not familiar with Leads Management? You can read our previous article for the leads management tutorial.

6. Select the leads you want to send an email to by clicking the checkbox on the left side of their name. Then click the “Send Email” button at the top-right part of the page.

Sending Emails
7. You can now select the “From” email from the dropdown once you’re done setting up your SMTP settings and start sending emails to your contacts.

