This tutorial will show you how to follow up with your clients.
For step-by-step instructions, read below:
Sending Mass Email to Leads
Note: We will need to use email templates and Organize the Leads into a list in order to send a mass email. You can check out the link below on how to create Email Templates and how to Organize the Leads into Lists.
Create Email Templates
Organize the Leads into Lists
1. Click on Leads located on the left side of your dashboard.

2. You can either search for the name, tags or simply put a check on the leads that you want to send the email to. 
3. Click on Emails.

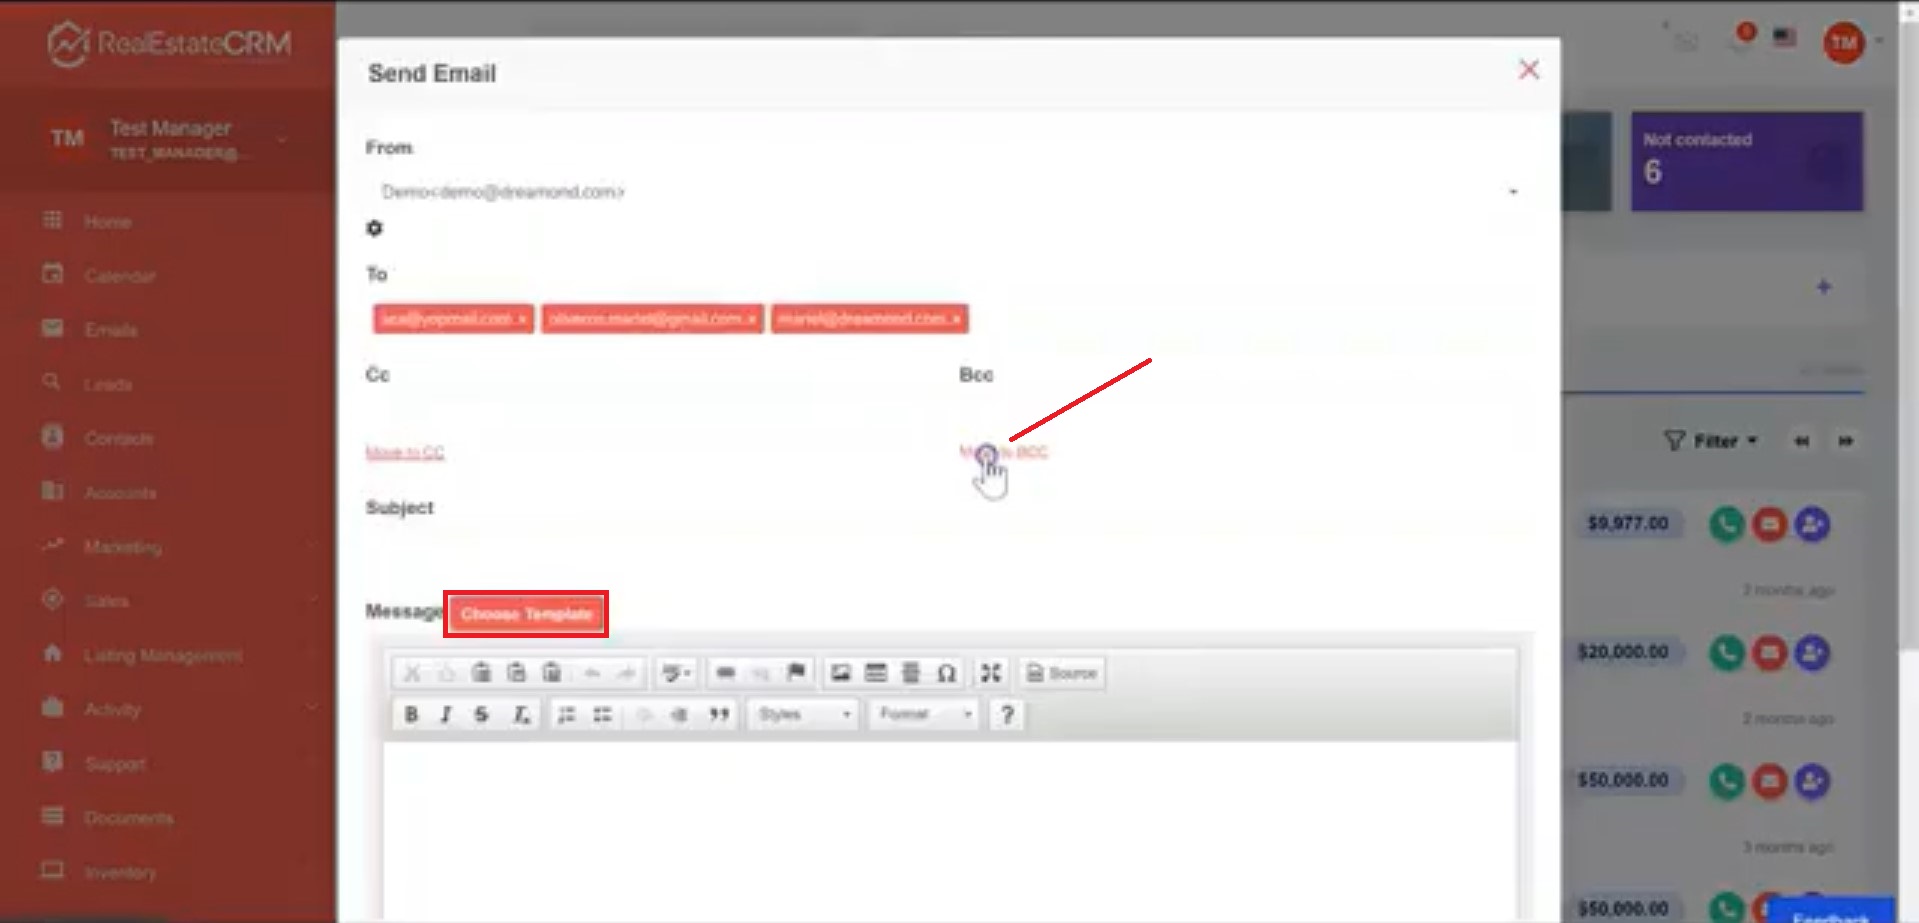
4. Click on Choose Template and select which email template would you like to use.
Note: Make sure that you also click on Move to BCC. It is important to have your contacts in your BCC so that they won’t see the other receivers.
Sending Mass Email to Contacts
Note: We will also need to segment contacts and create lists in order to proceed with using mass email to contacts. You can check out the tutorial below.
How To Segment Contacts And Create List Of Contacts
1. Click on Contacts located on the left side of your dashboard.
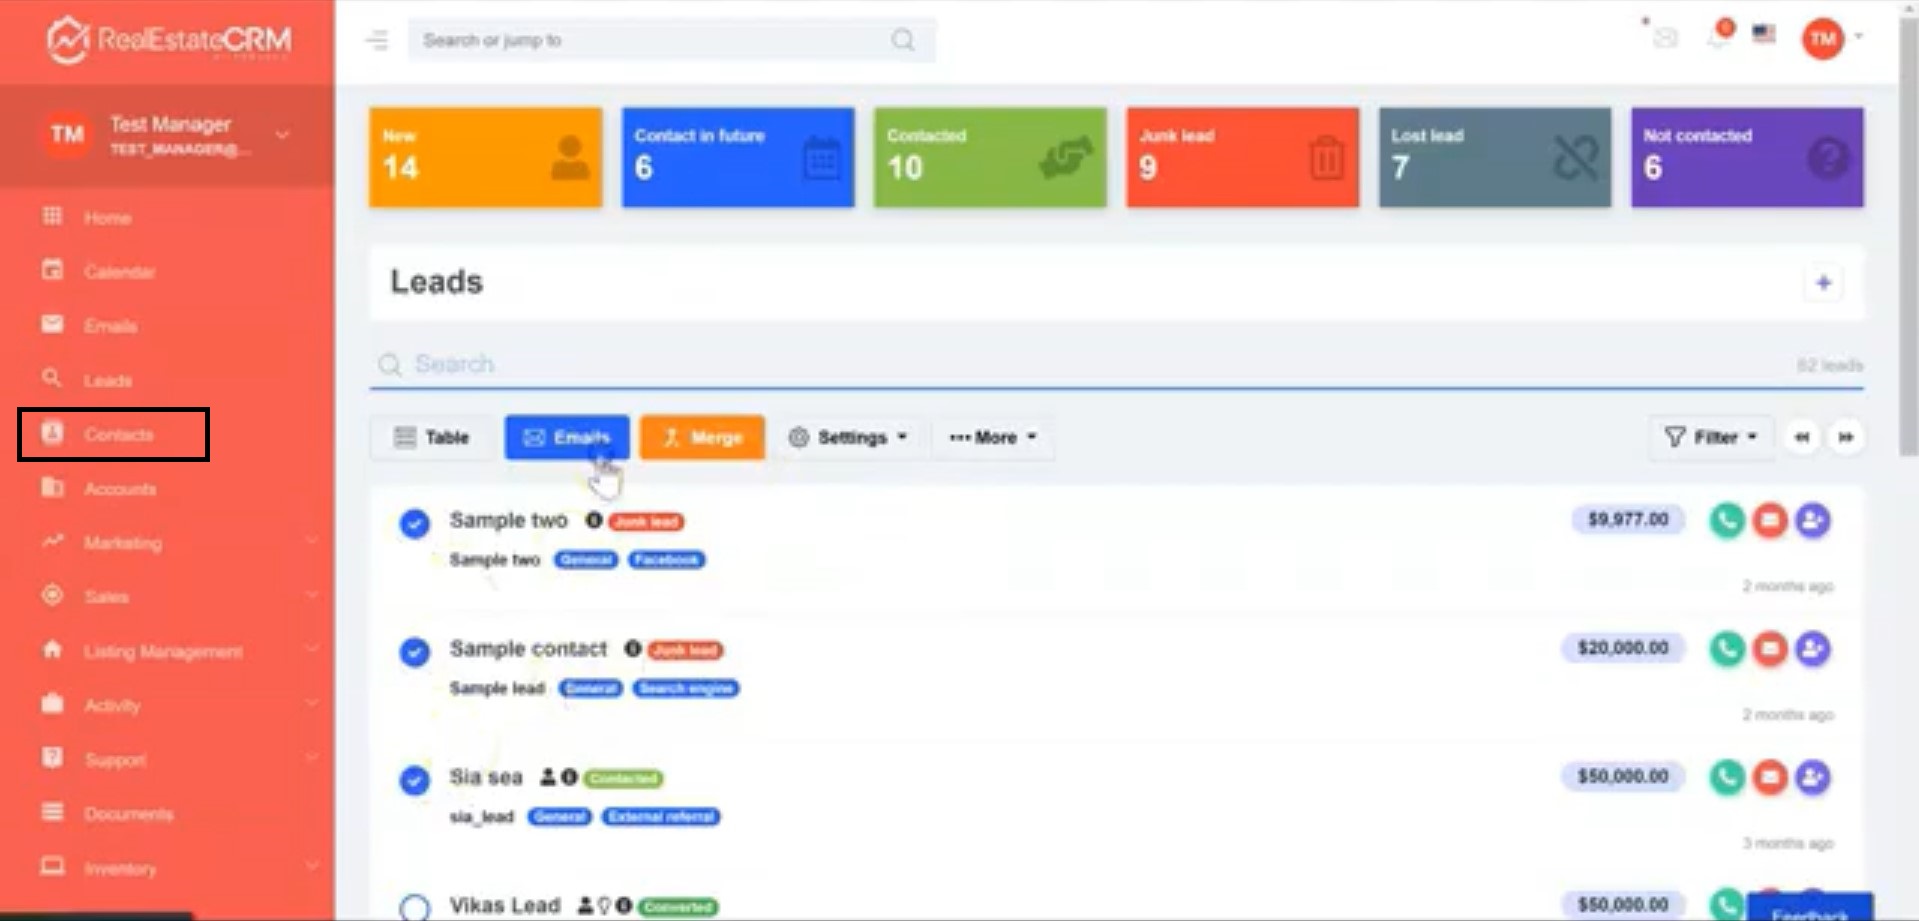
2. Click on Lists and a new window will pop up where you can select a specific list.
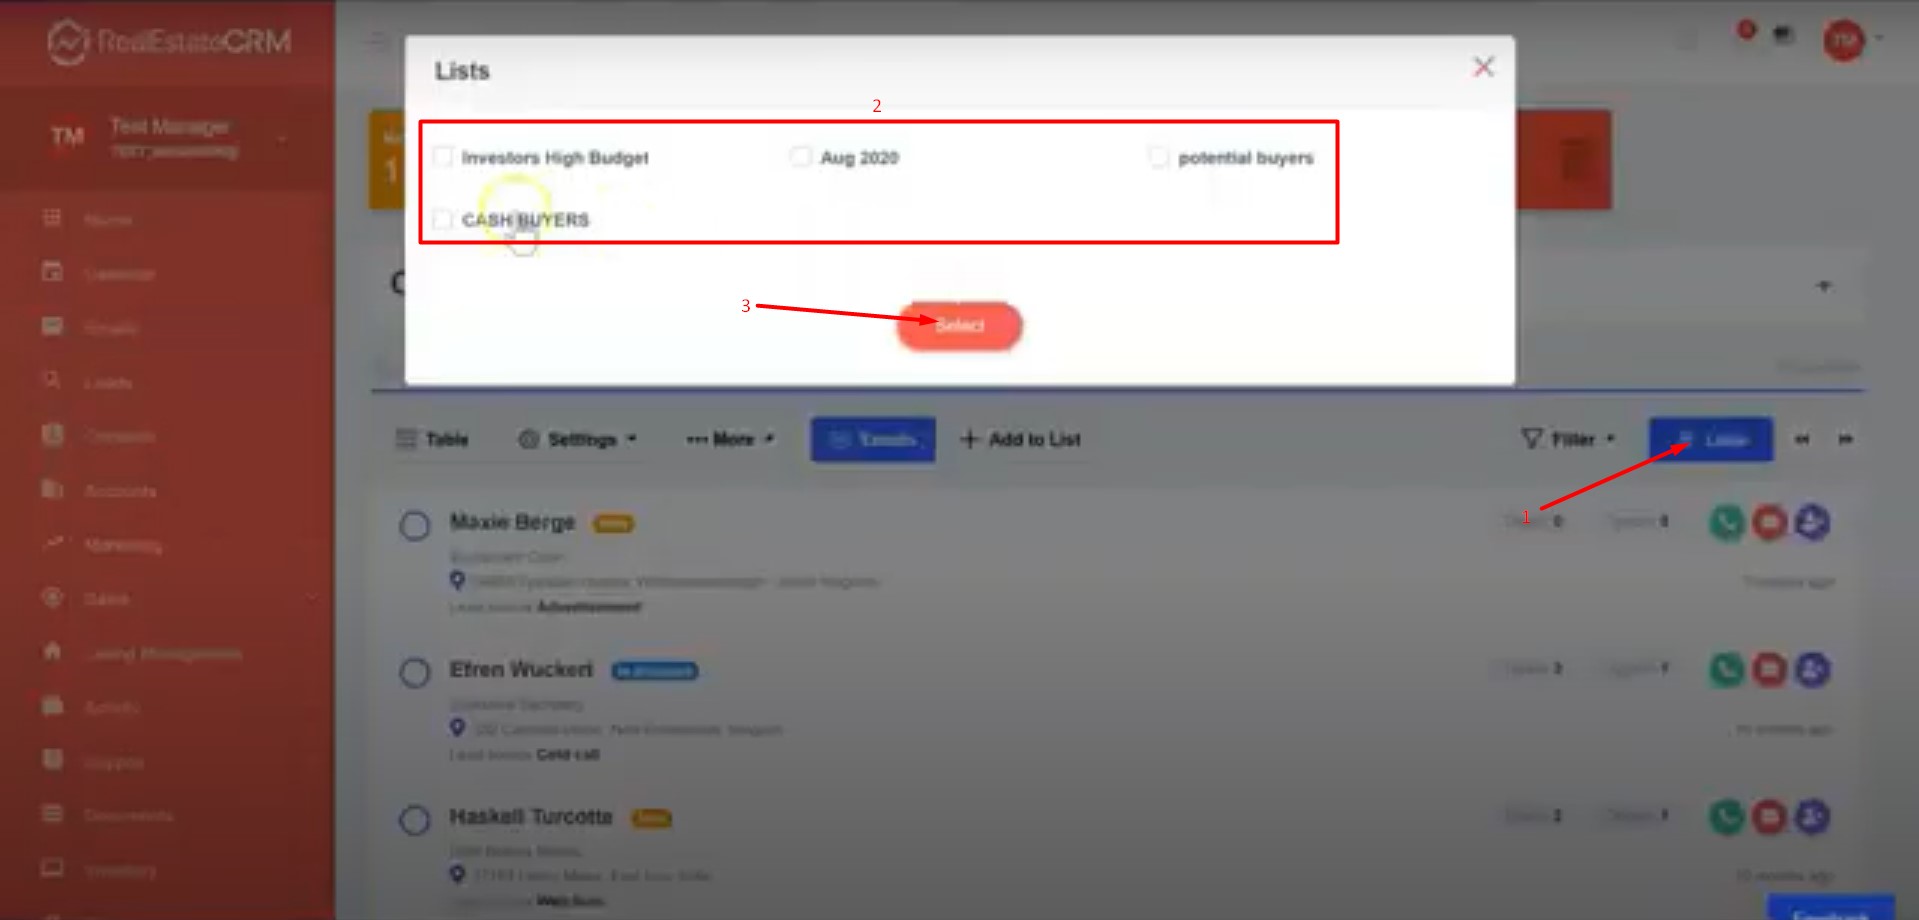
3. Select the list you want to send the mass email to.
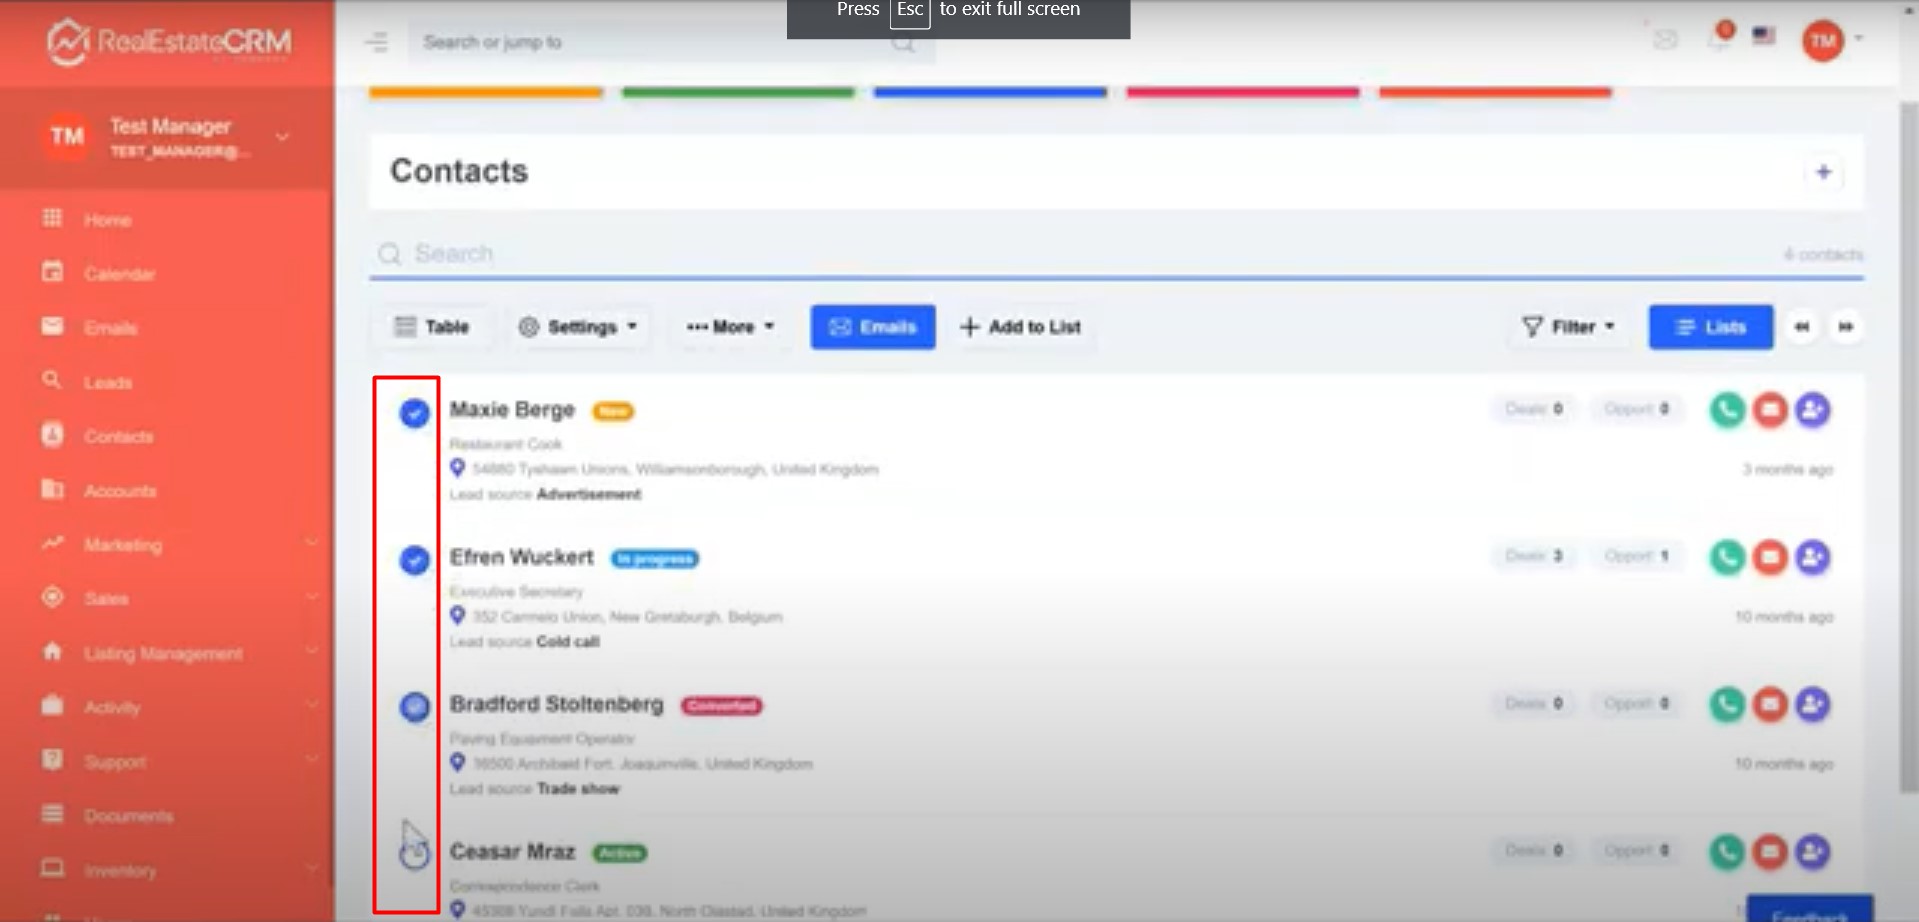
4. Click on Emails and choose which email template you would like to use.
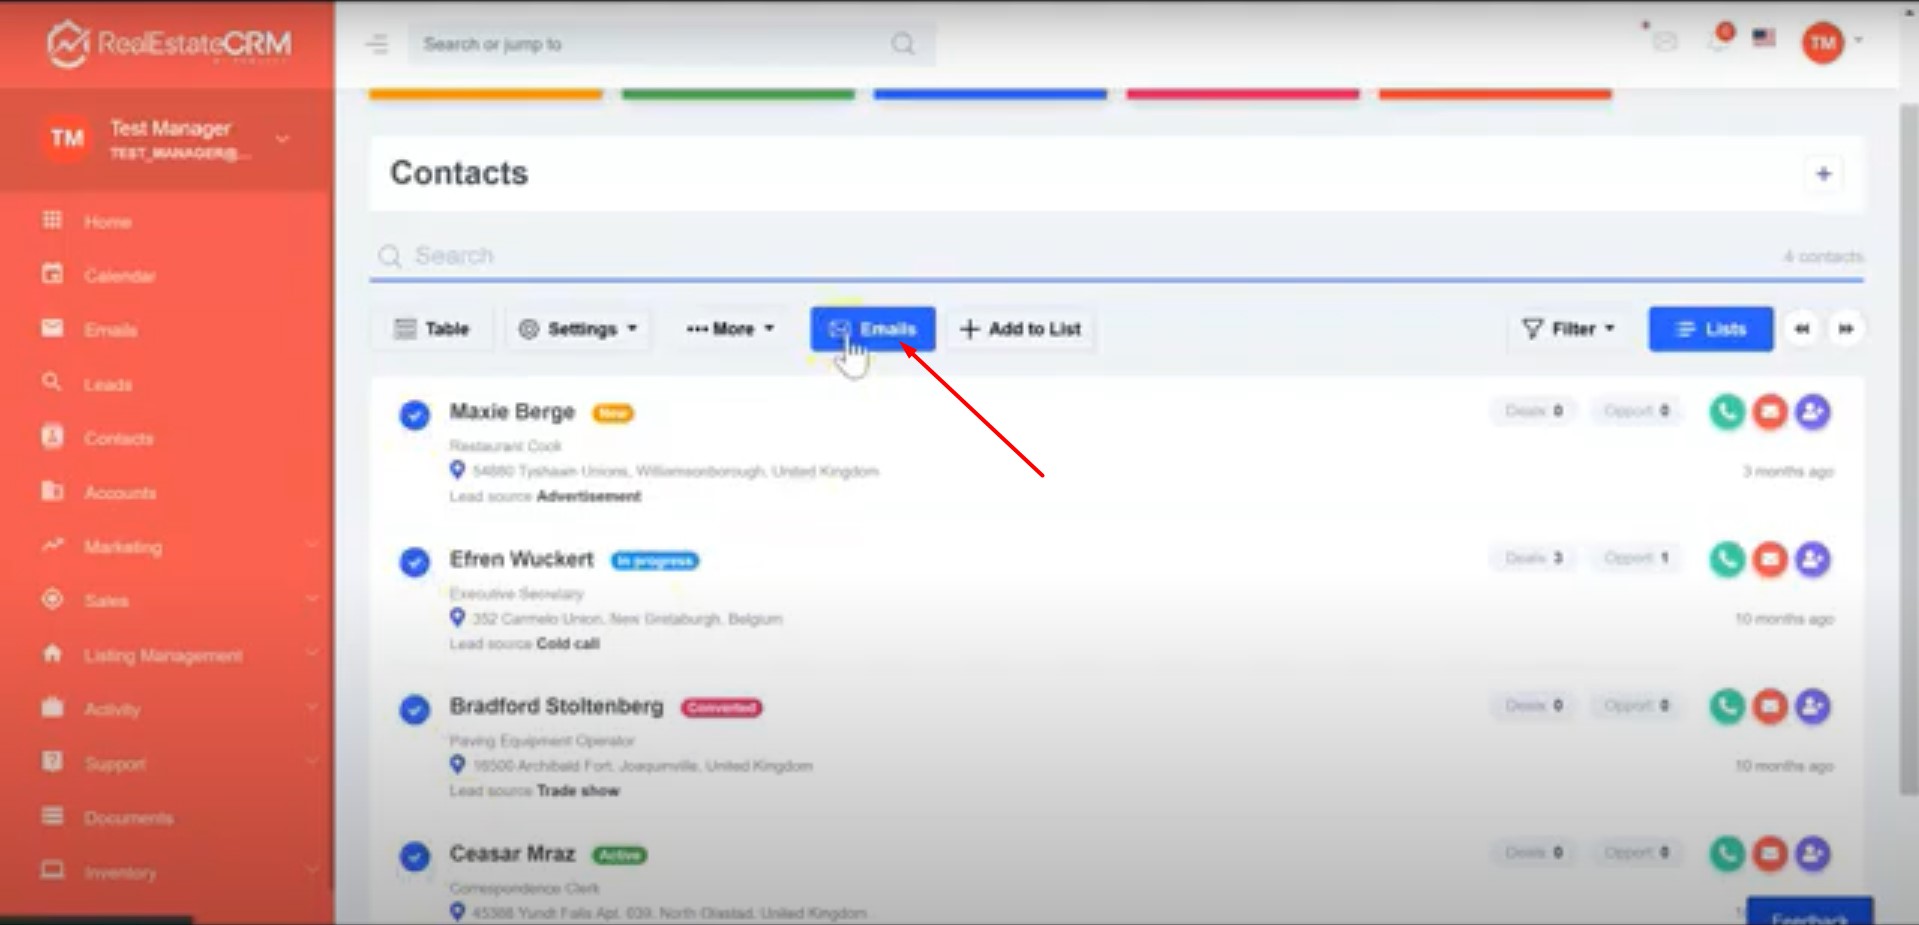
Sending Mass Email via Opportunities Lists
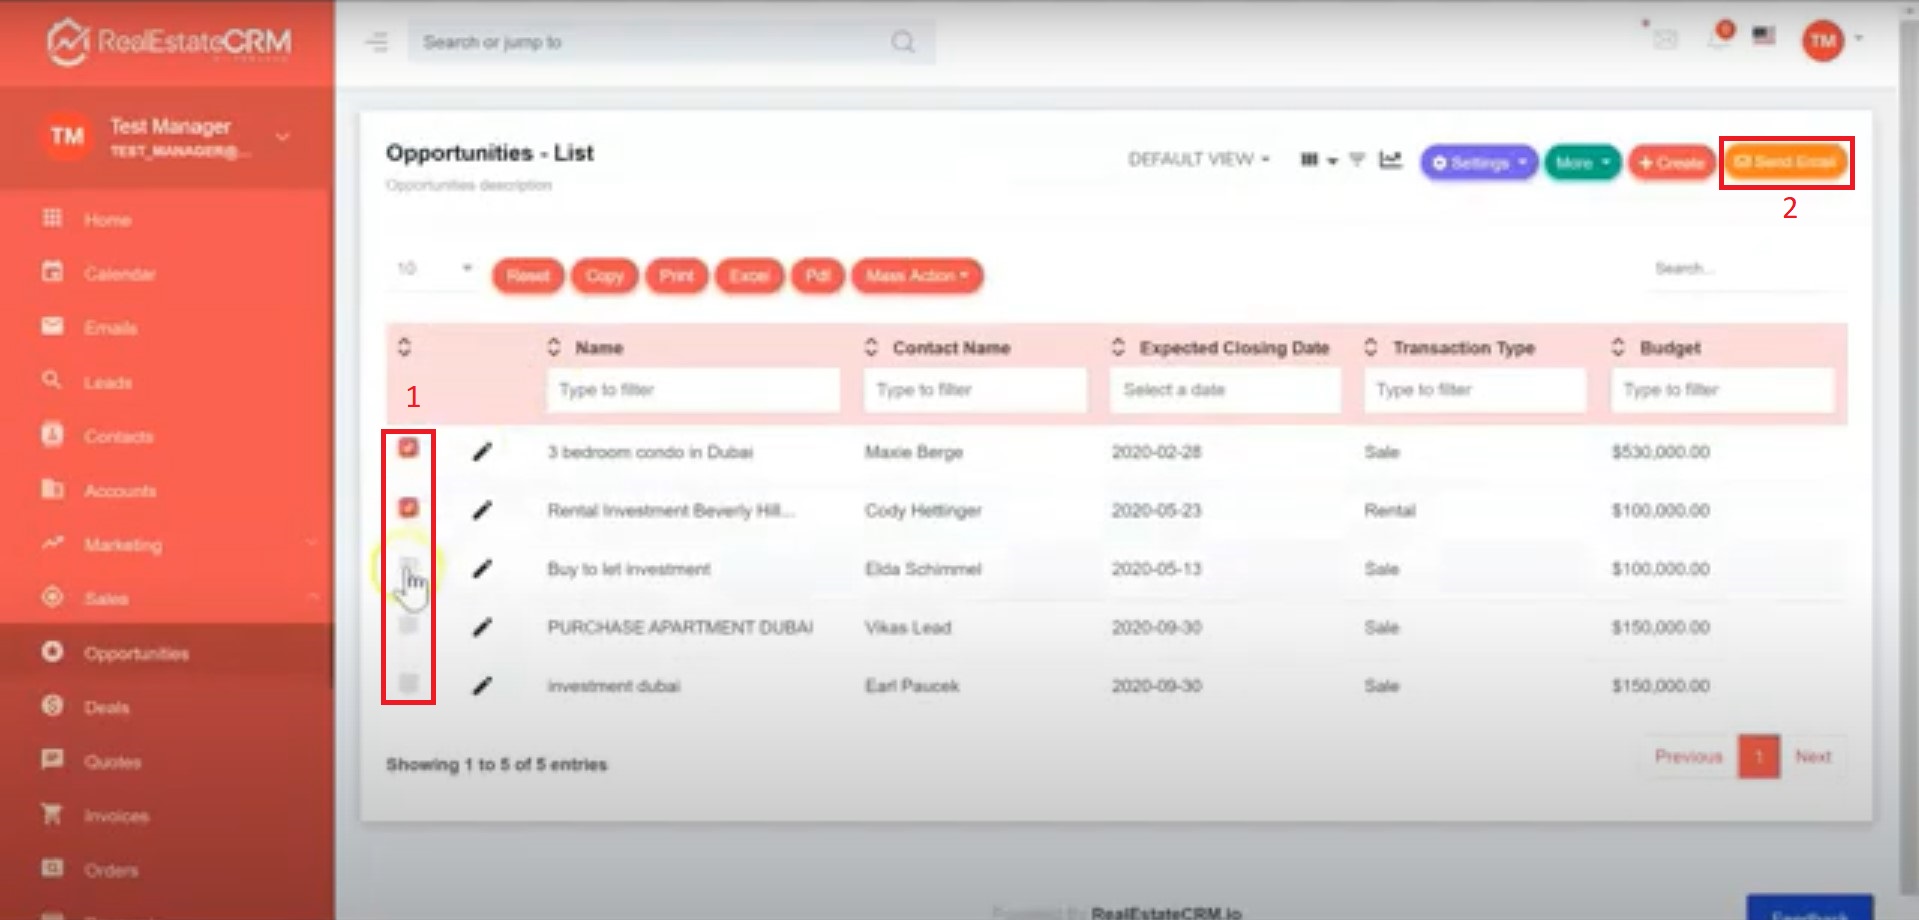
1. Click on Sales > Opportunities located on the left side of your dashboard then click on the list icon indicated by the screenshot below.

2. Select the lists you wish to send an email to by putting a check on the checkboxes indicated in the screenshot below. Click on Send Email located at the upper right of your dashboard and select a template which you would want to use for the email.
Sending Mass Email via Opportunities Filter
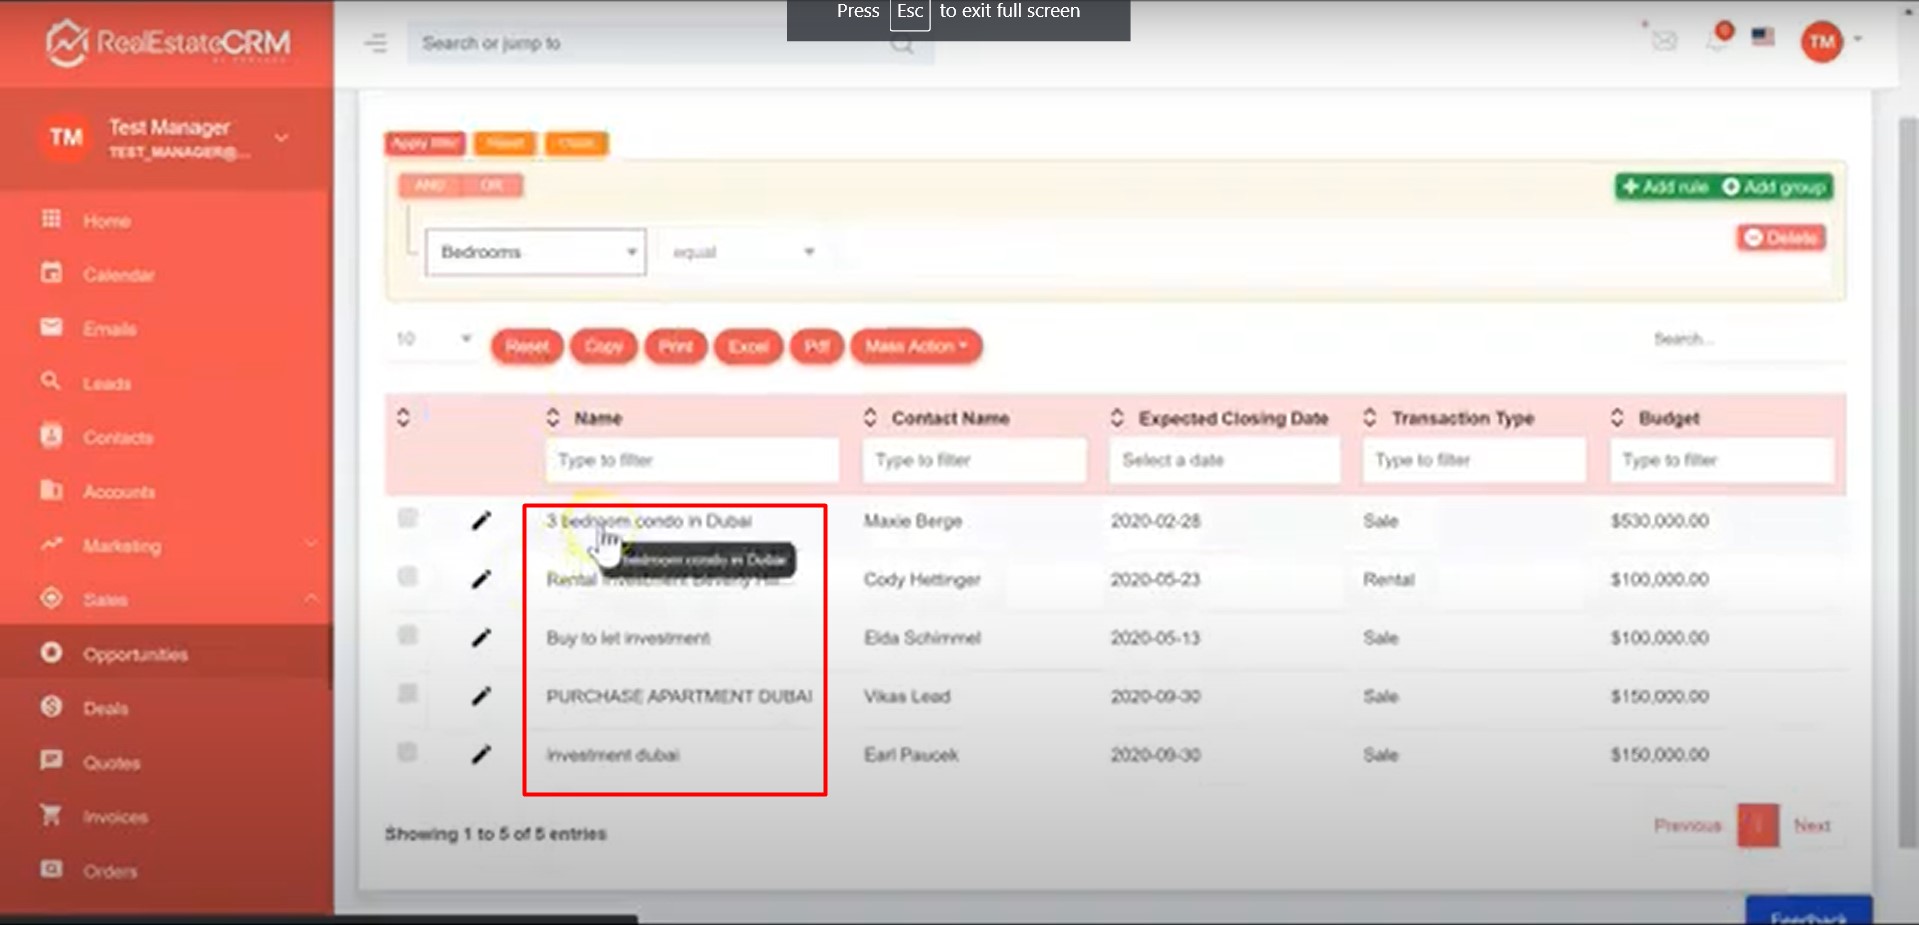
1. On the Opportunities List, click on the filter icon indicated in the screenshot below. A new drop-down list will pop up where you can select a value to filter out the list. You can also type in a value in the textbox indicated by number 4 on the screenshot below.
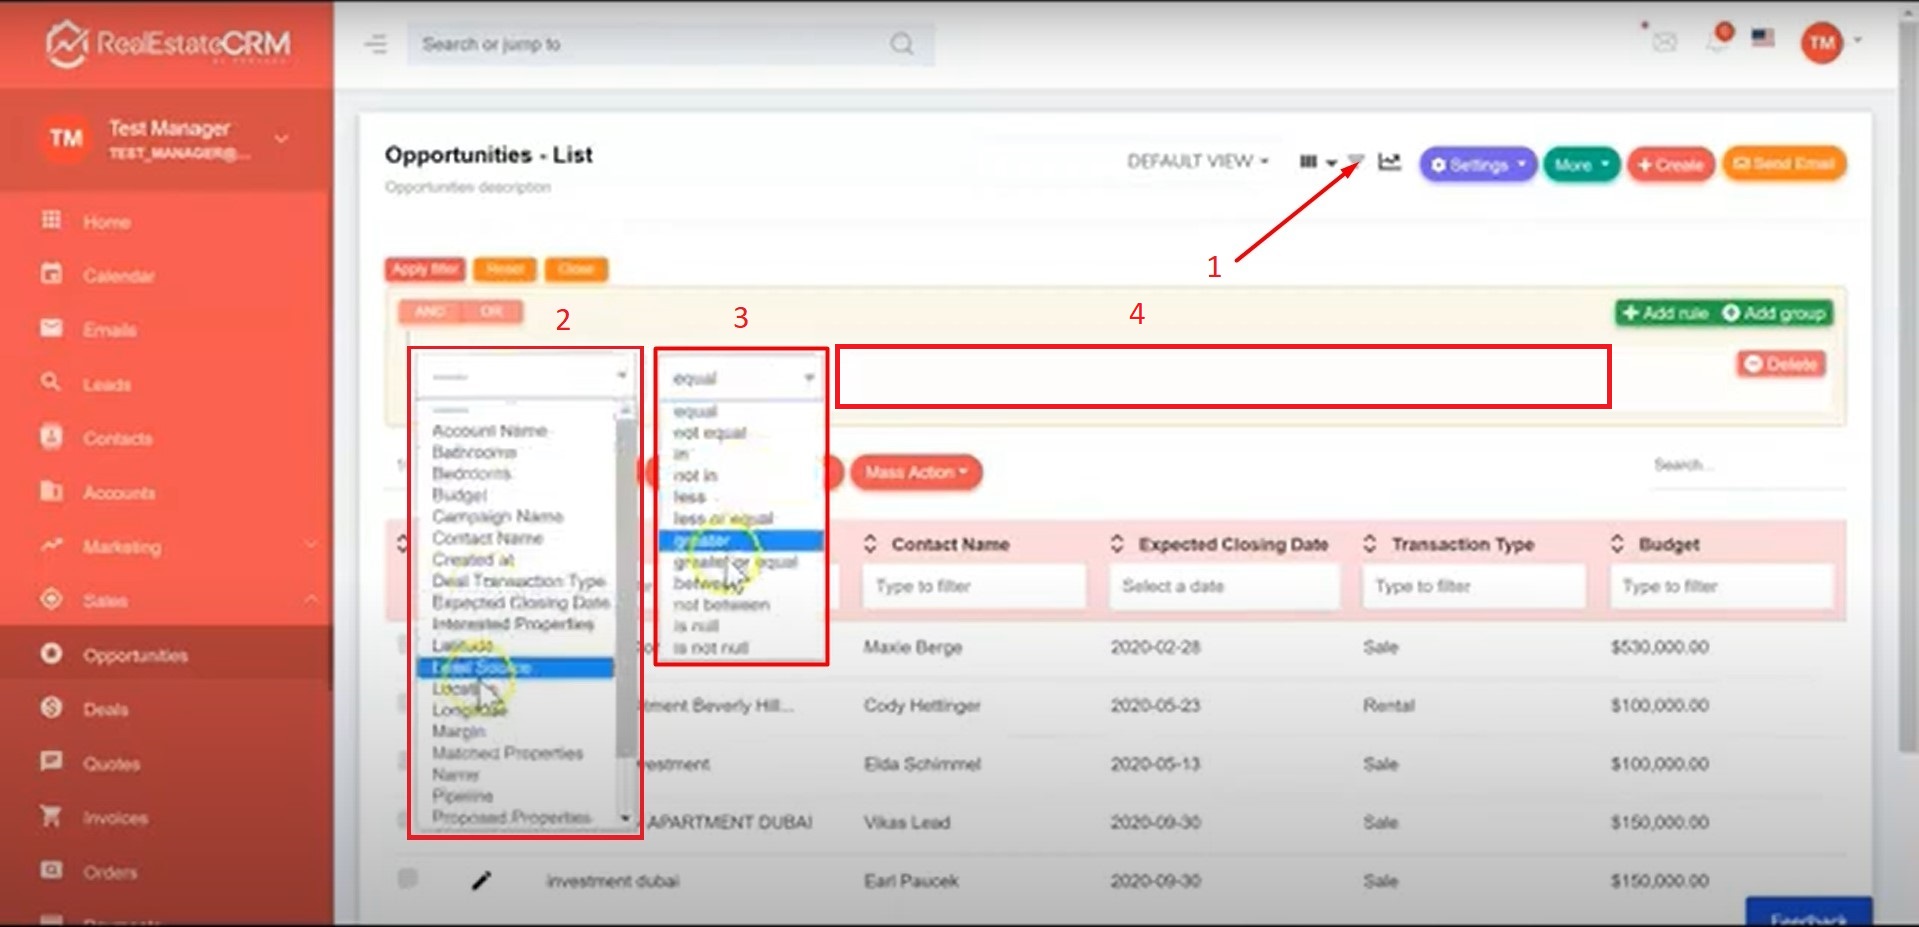
2. Select the lists you wish to send an email to by putting a check on the checkboxes indicated in the screenshot below. Click on Send Email located at the upper right of your dashboard and select a template which you would want to use for the email.

Sending an Email Including the Proposal Details
1. Click on one of the listings you want to send an email to.
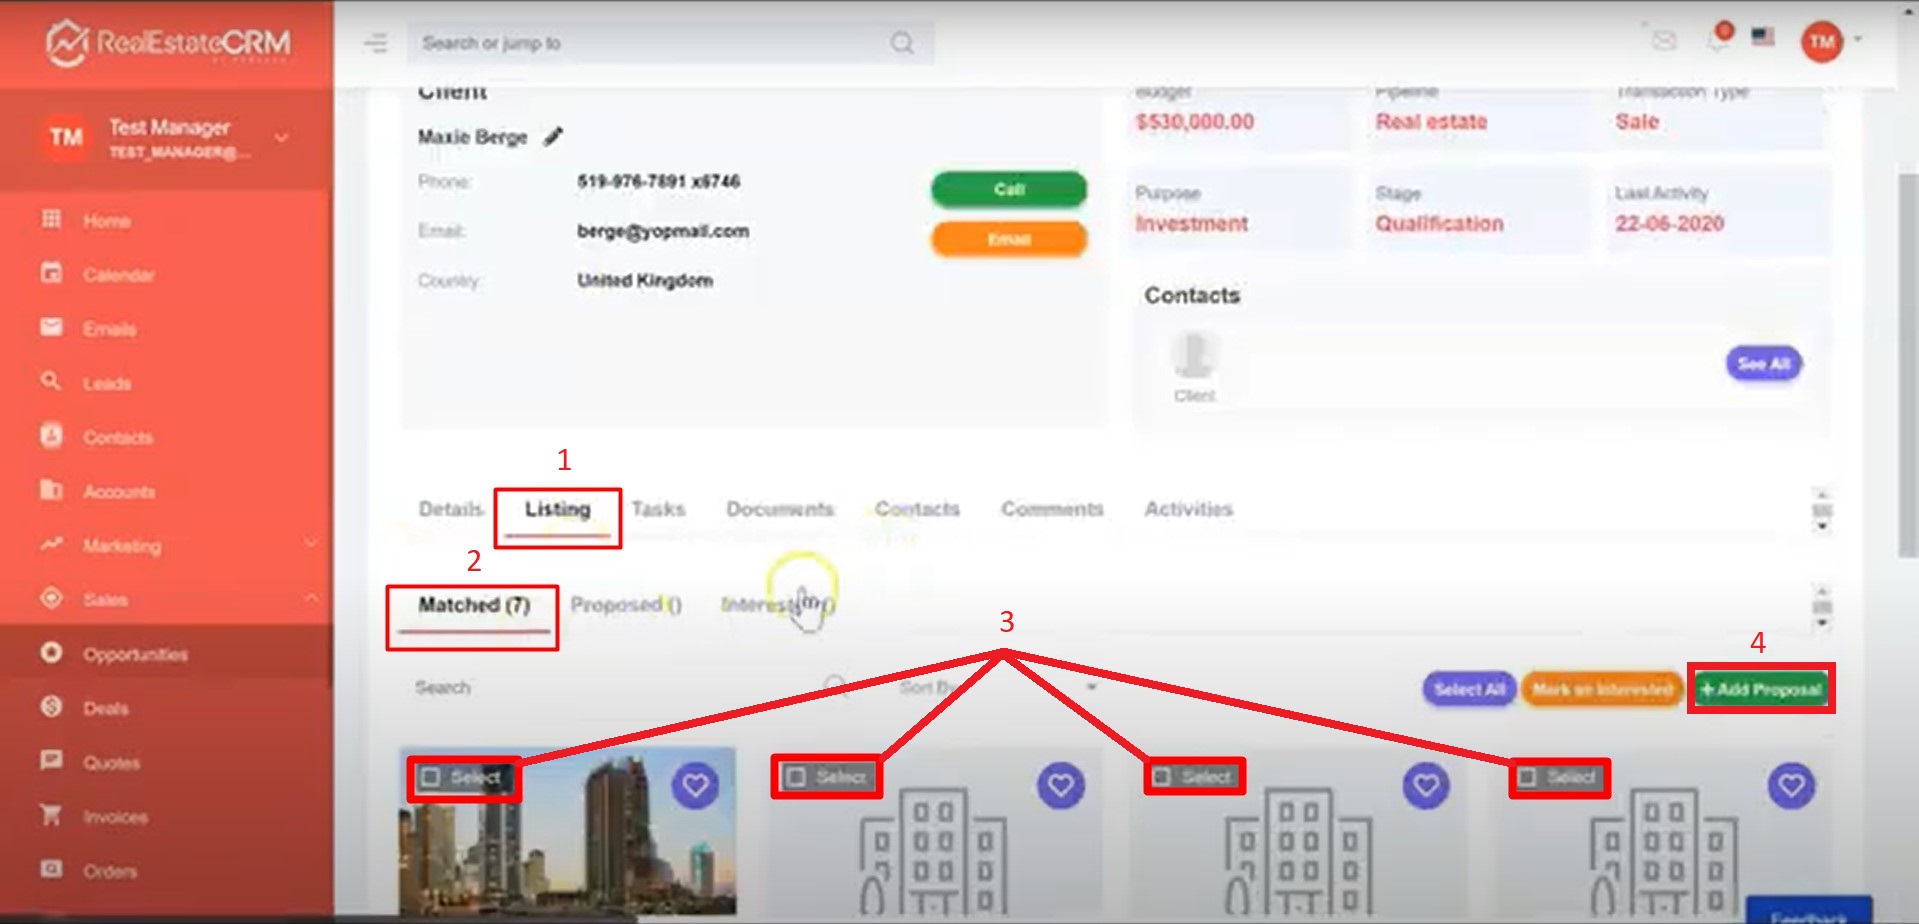
2. Click on Listing > Matched. You can then select which of the listing you wish to add to the proposal by putting a checkmark on the checkboxes indicated on the screenshot below then click on Add Proposal.
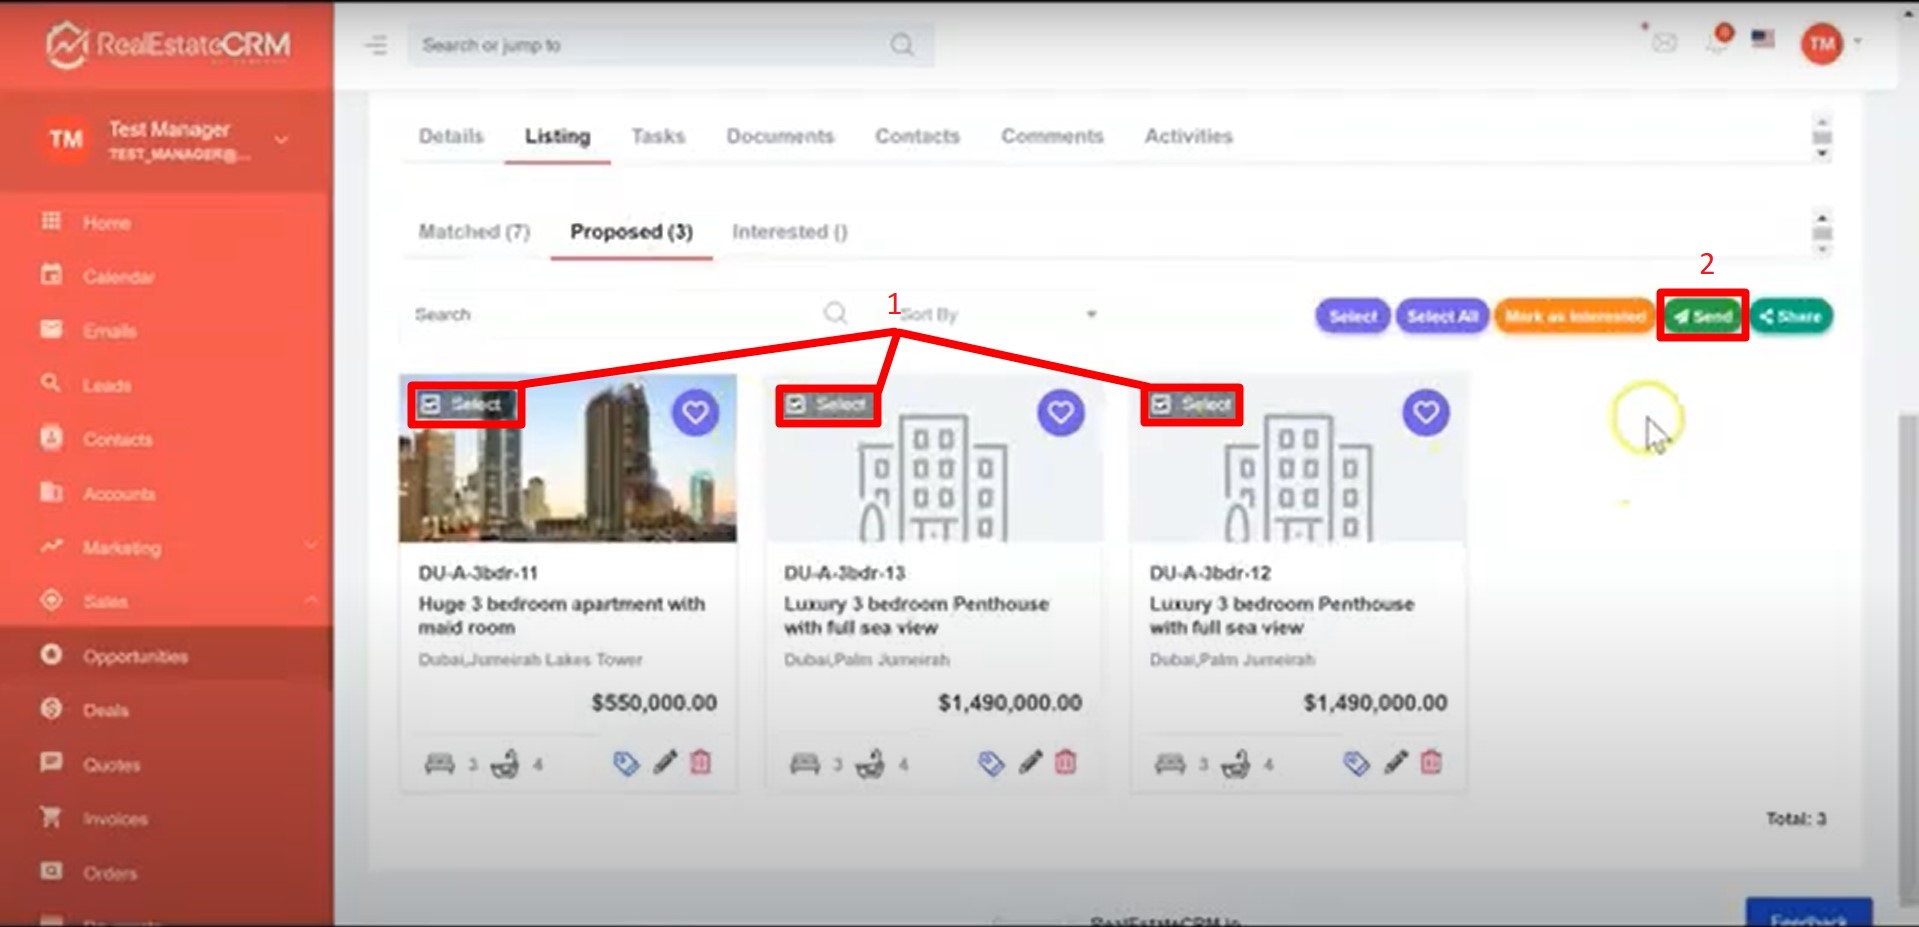
3. Click on the Proposed tab and select which of the listings you want to add to the email by putting a check on the checkboxes shown on the screenshot below then click on Send.
Tip: You can share the details of the list by clicking on the Share button located at the right side of the page near the send button.
Creating Email Campaigns
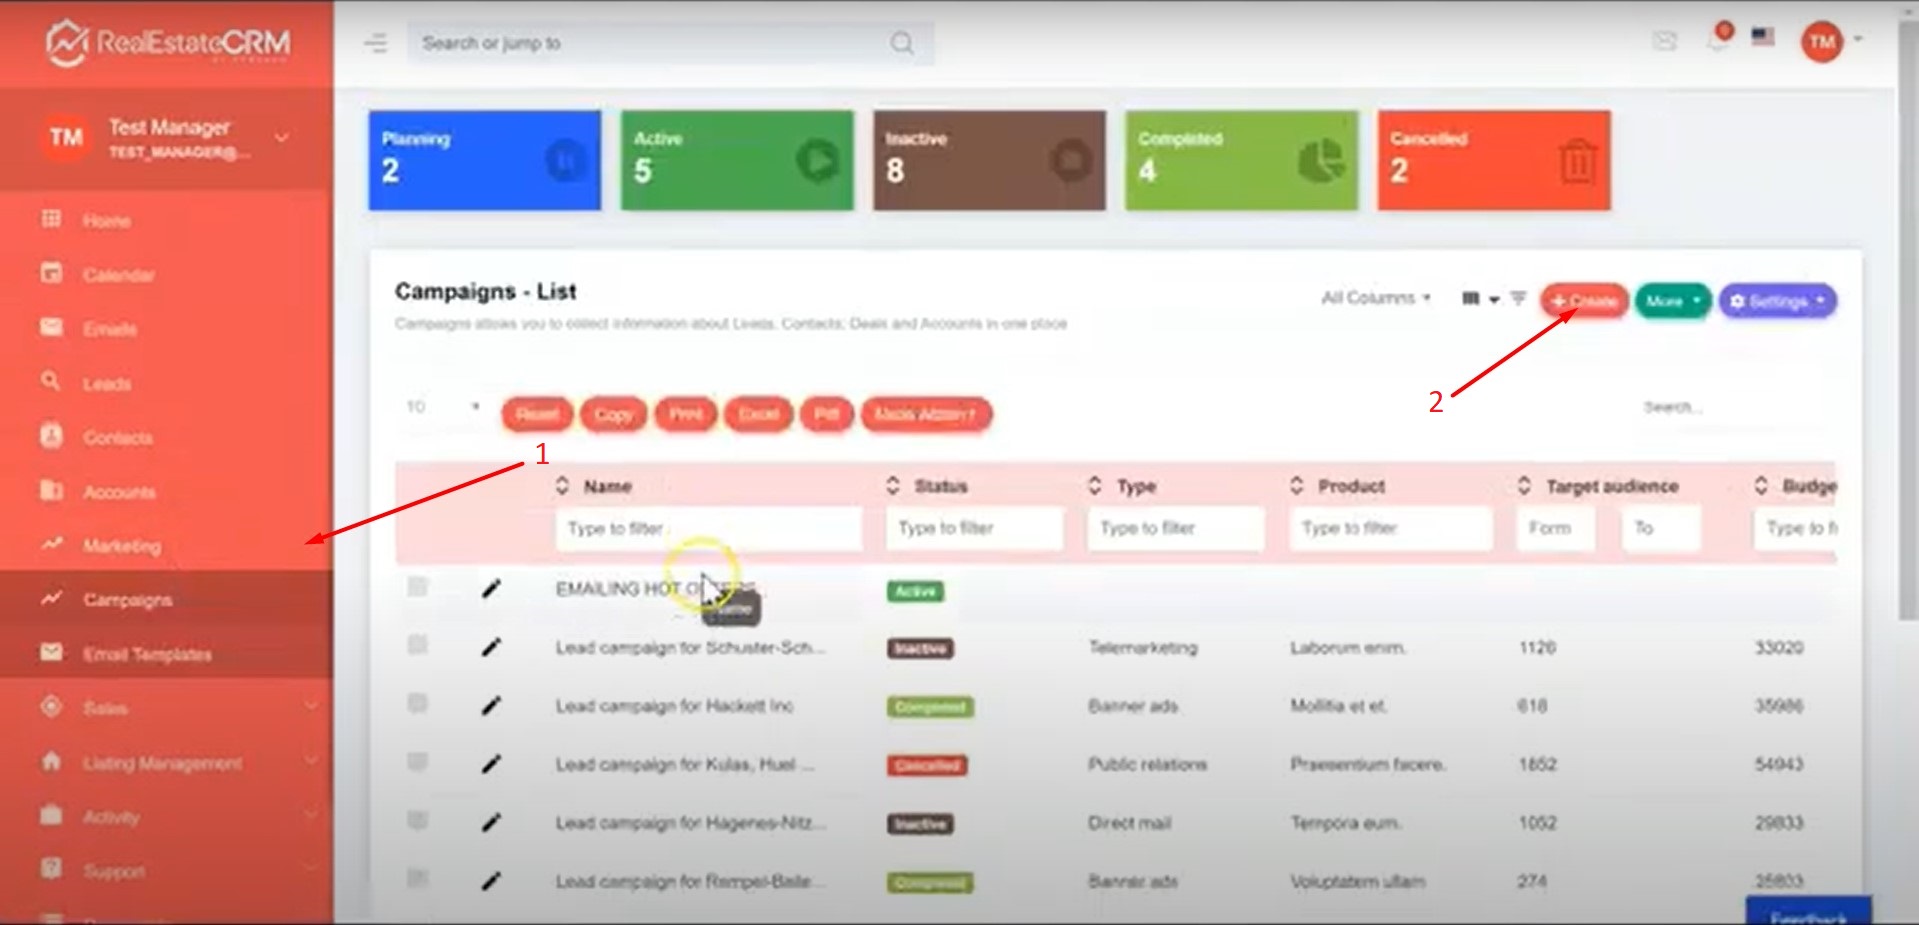
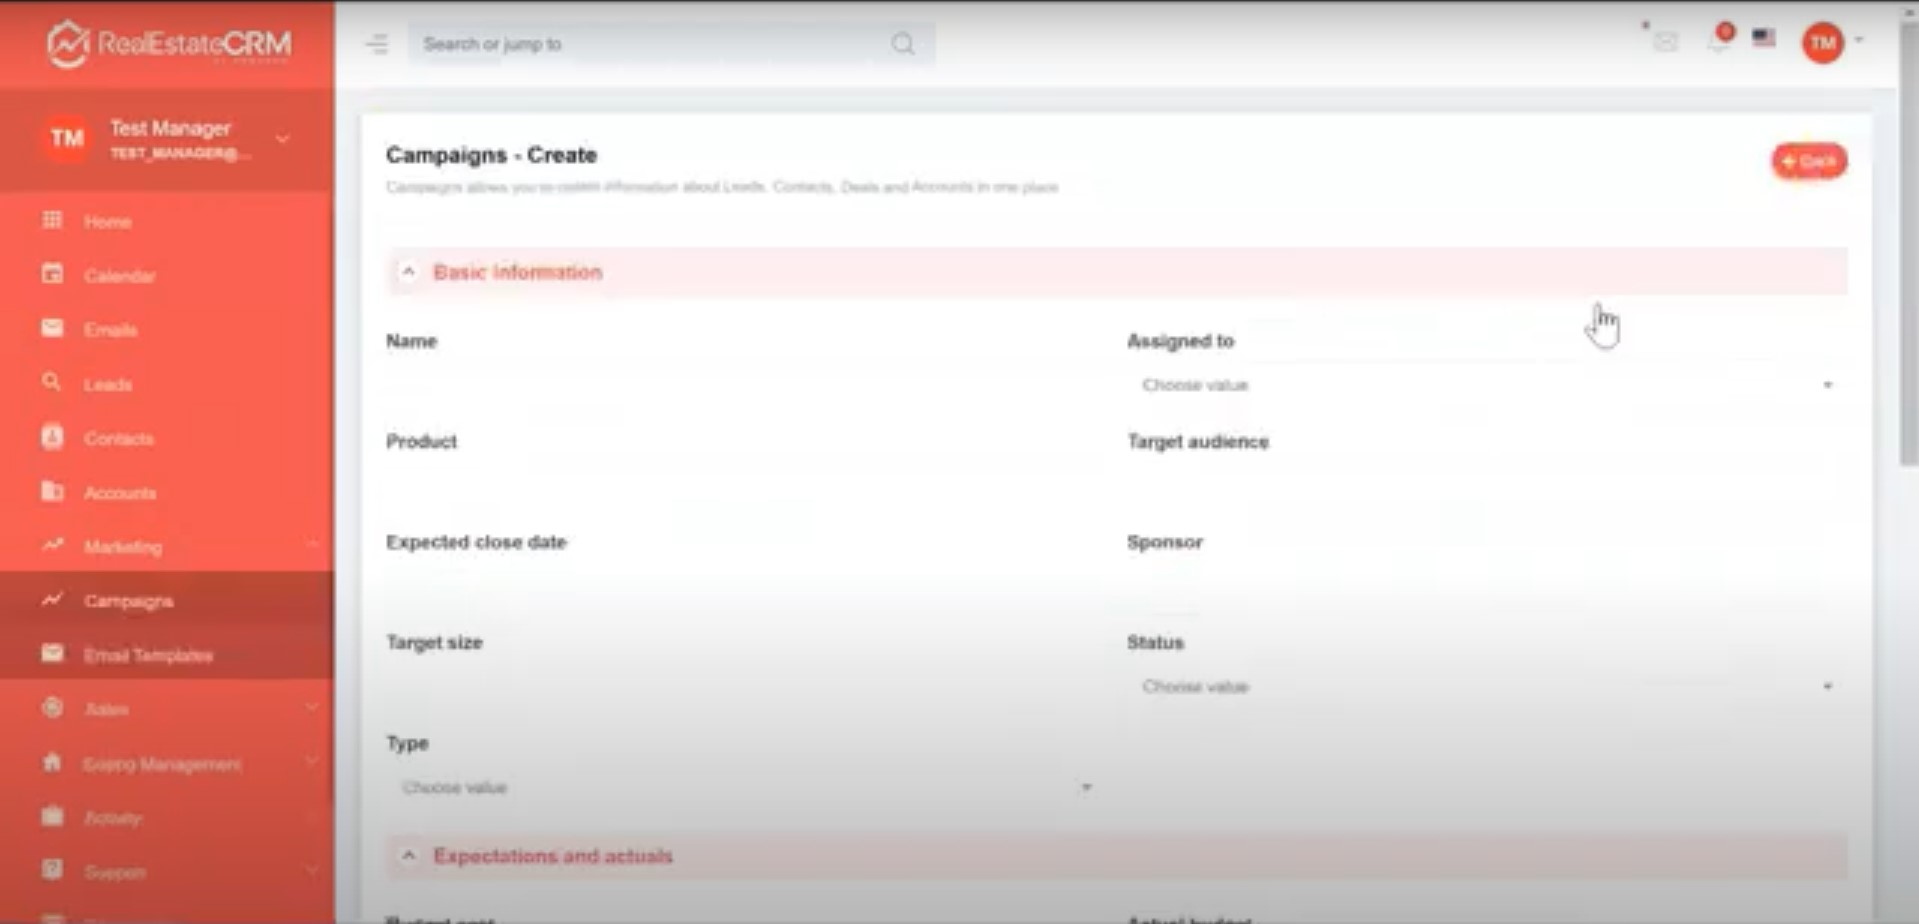
1. Click on Marketing > Campaigns located on the right side of your dashboard and click on Create.
2. Fill out all of the information required for the email campaign and click on Save at the bottom of the page.
3. Click on the new Email Campaign you created to add or update the information about the campaign. 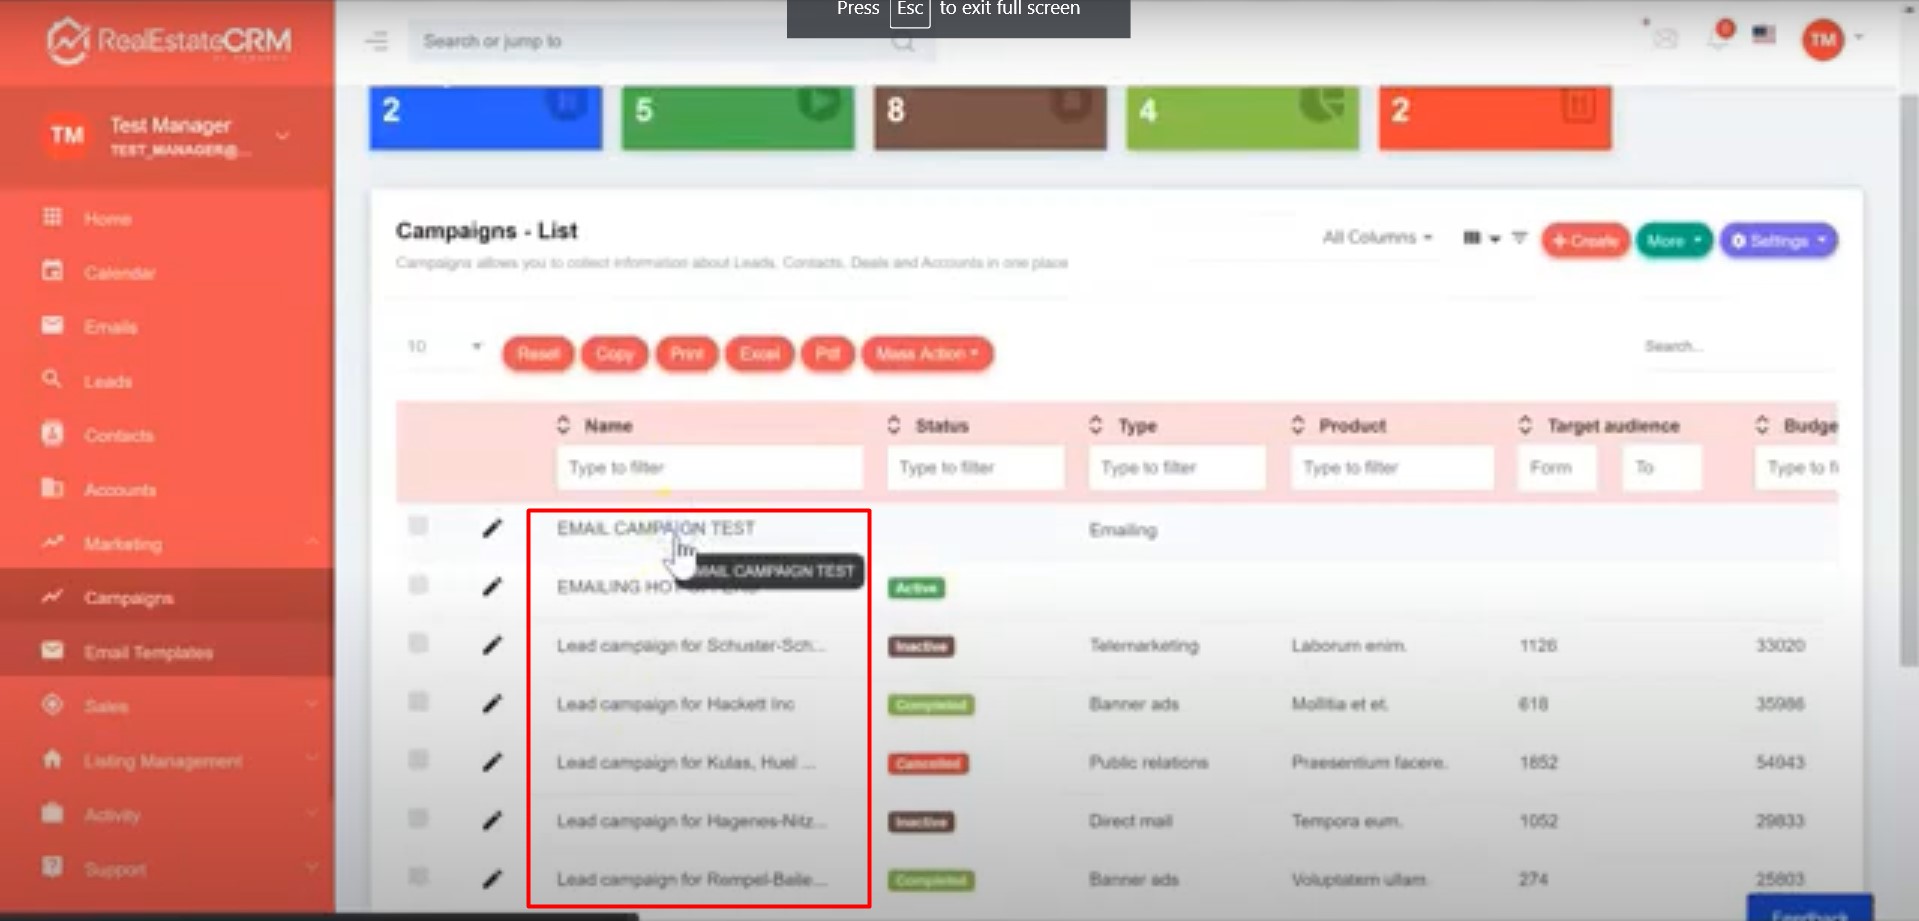
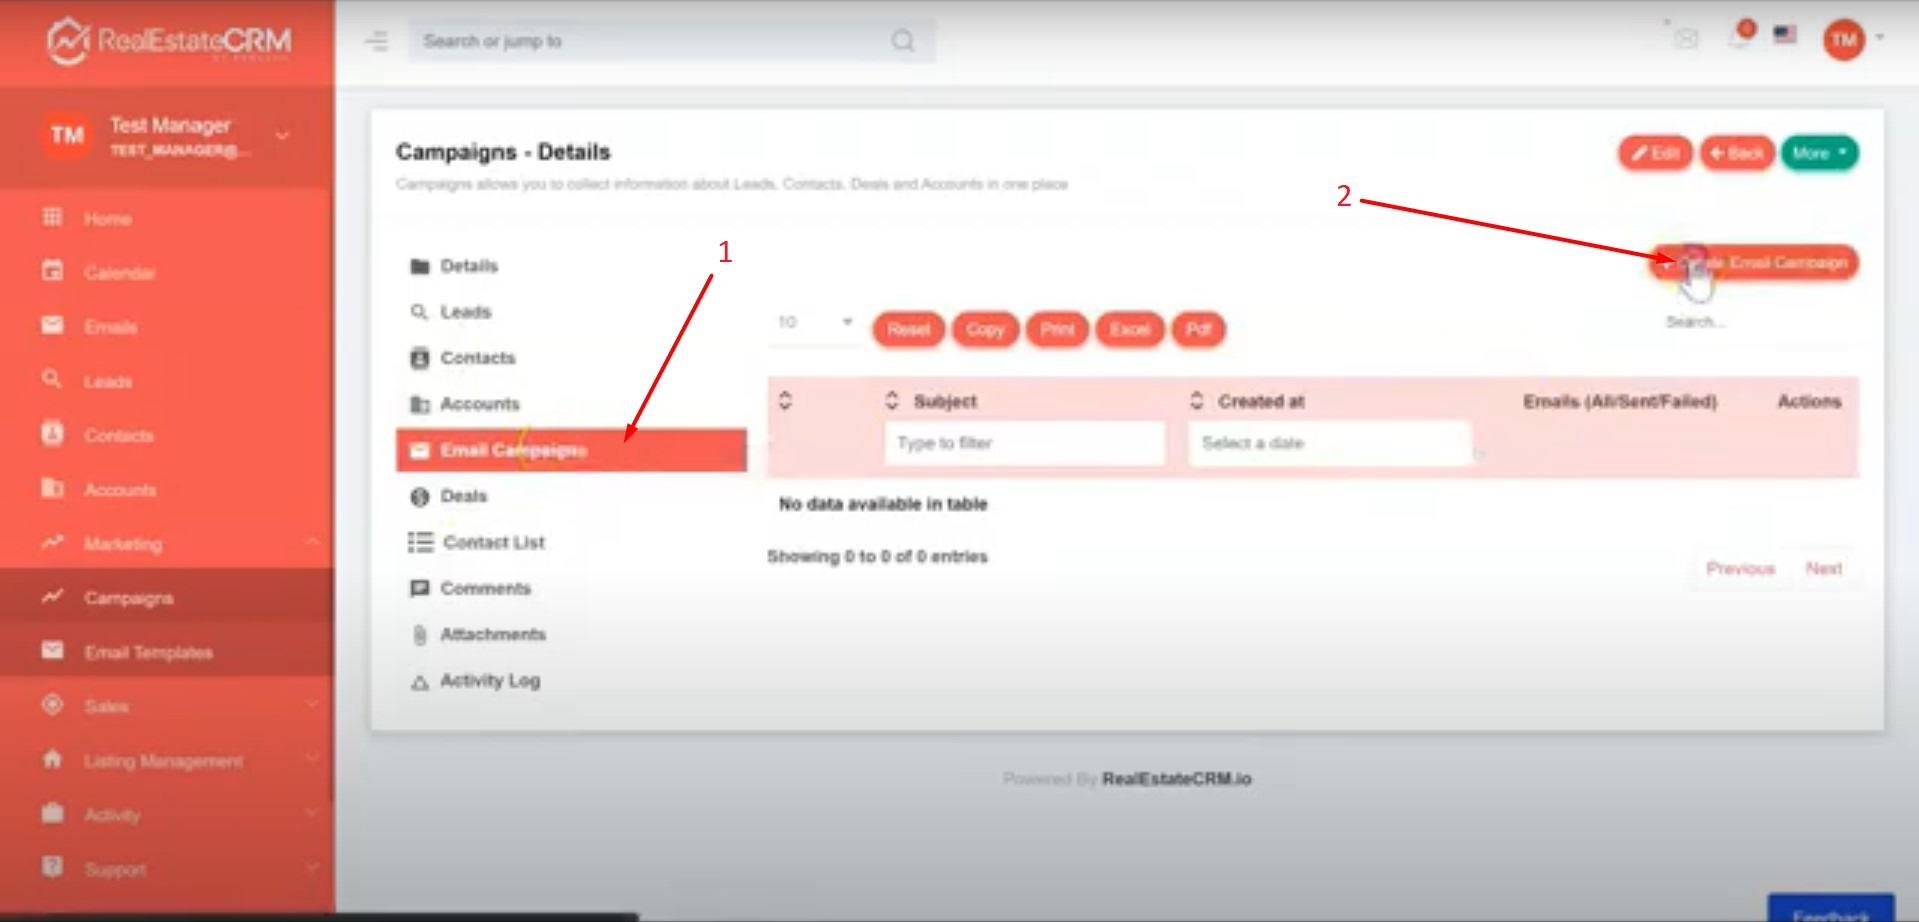
4. You can update the Campaign Leads, Contacts, Contact List by clicking their categories shown in the screenshot below.
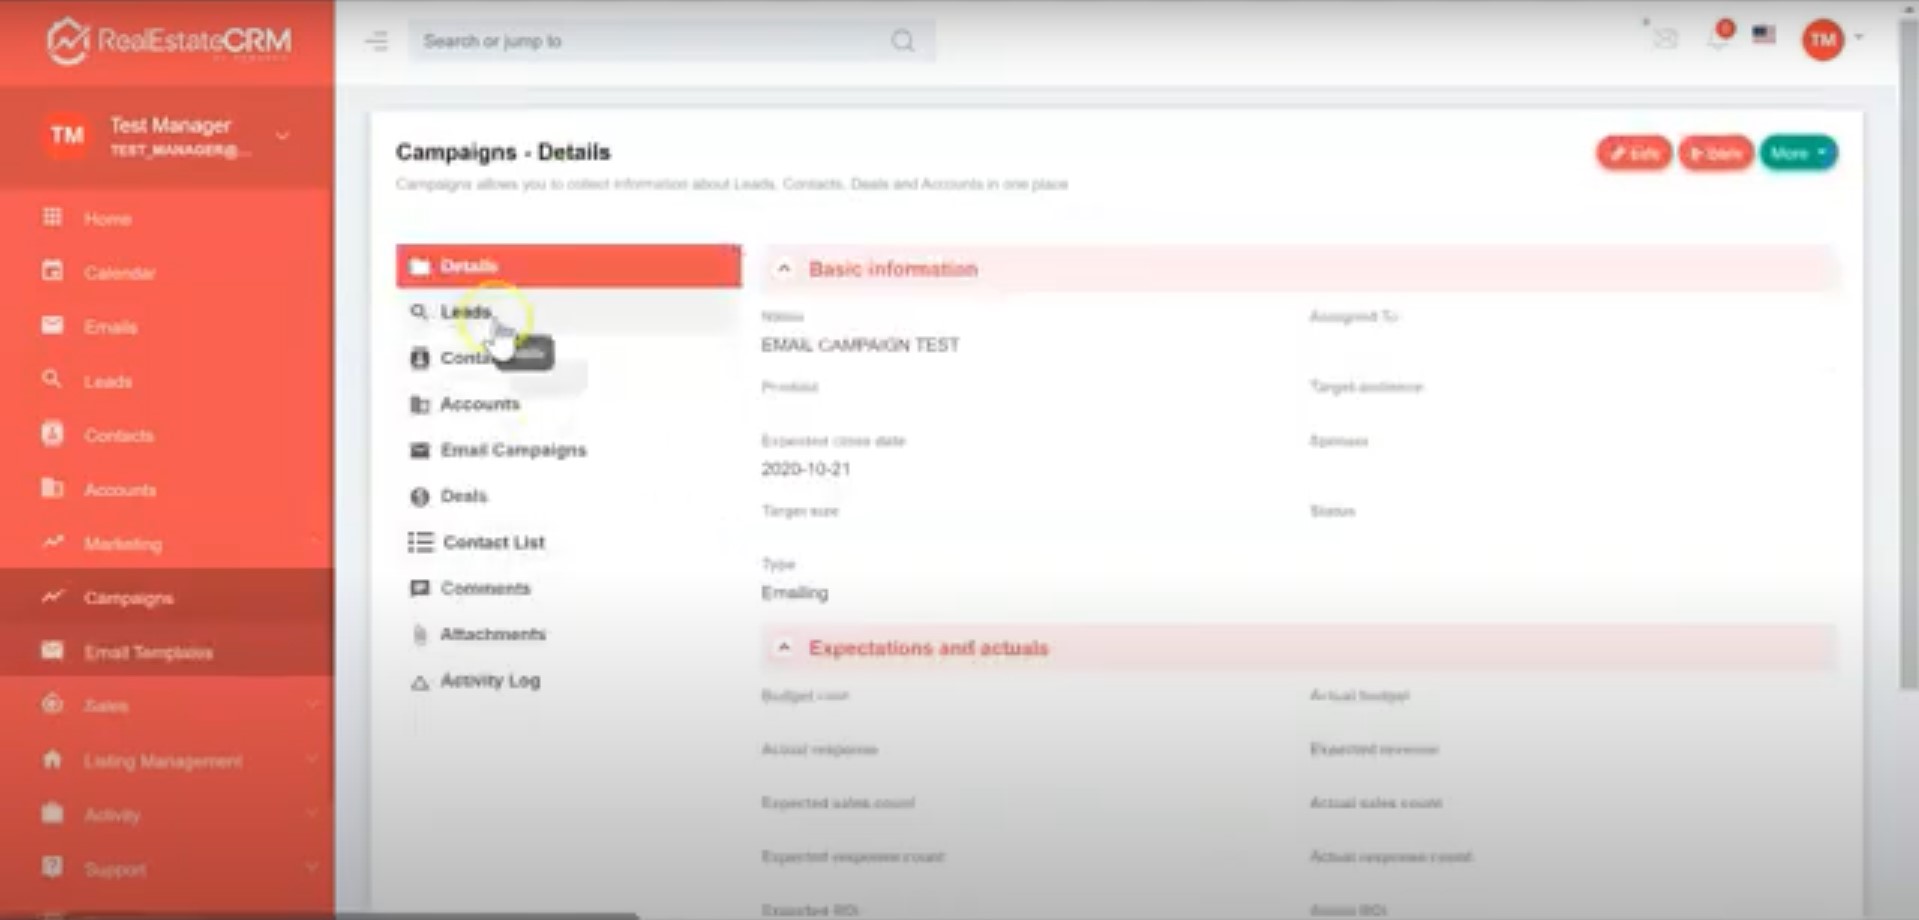
5. Click on Email Campaigns > Create Email Campaigns. Select a template you want to use for the email. You can also schedule the date when the email will be sent out at the bottom of the page.
